Yesterday I drove home from work at midnight and took the long way so I could do a top speed run. The Electric Booger achieved a top speed of 85 km/h (indicated).
After the top speed run came the uphill. After the uphill I decided to drive around a bit more to see how the batteries performed. The result: they SUCK. BAD. My total drive was 12.0 km and for argument's sake we'll say 15.0 km if there was no top speed run and no uphill. By 3 km from home the batteries were sagging so bad that my top speed (trying not to let the voltage drop too low) was 50 km/h. Not fun.
Battery Math
I cannot find an amp-hr rating for these batteries but going by weight/size and comparing them to other batteries, they are each approx 100AH. That means I have 14,400 watt-hrs of theoretical energy. Factoring Peukert effect at 50%, that should give 7200 watt-hrs to 100% DOD. Assuming the eBooger consumes 300 watt-hr/mile (186 watt-hr/km), a 15 km trip will use 2796 watt-hrs of energy. Assuming I was down to 80% DOD last night, this means that my pack is only delivering 48% of the power I expected.
Unfortunately I do not have an amp counter so I do not know how much power the Electric Booger is actually consuming. Maybe on today's commute I will install the remote inductive amp meter and take notes.
Battery Alternatives
I can get 100AH marine batteries from Interstate for cheap (~$100 each). But I have a sneaking suspicion that they will not be much better than the batteries I already have because like mine, they are not really designed for repeated deep cycles. What I would really like is AGM (absorbed glass matt) batteries, a la Optima Yellow or Blue tops because they do not sag like flooded batteries. Unfortunately these are expensive (~$275 each) and only last 200 cycles before they start crapping out.
Lithiums would be the answer, but for a 77V 100AH pack (24 cells) with BMS (battery management system) and a proper charger we are talking $4000. Considering the eBooger is a beater to begin with, I don't really like that option. For now, at least.
Does anyone have any suggestions?
My Highly Inefficient Chargers
Yesterday I charged with my new Kill A Watt power consumption meter plugged in. My 2796 watt-hr drive home took 5070 watt-hrs out of the wall to charge. That's 55% efficient. And that's pathetic. They use 122 watts even after my batteries are fully charged and the chargers are doing nothing but making a humming noise. My round trip commute to work ended up being 627 watt-hr/mile or 54 mpge. Yikes. That's horrible, but still much better than it did with an ICE doing the job. Keep in mind these calculations are based on the assumption that the car averages 300 watt-hr/mile. I may know actual numbers after today's commute.
So the Electric Booger is doing the job, but I am a little bit unhappy with the way the car runs. That being said, I am only into the project for $2250, so should I complain?
Tuesday, October 30, 2012
Thursday, October 25, 2012
Decal and Battery Water
It has been a fairly uneventful week with the Electric Booger. Just driving it to work every day - not much more. I got a nice decal made up for the back:
 You will also notice that Vanessa finally has her parking spot in the garage back.
Today I checked the water level in all the batteries. Deep discharging and charging lead acid batteries causes them to drink water, and it is important to keep the water level above the plates inside each cell because they will get damaged if the plates are exposed. Since the beginning of last week the water levels have not dropped at all. It's a good thing too, because I am pretty much out of distilled water.

Today I checked the water level in all the batteries. Deep discharging and charging lead acid batteries causes them to drink water, and it is important to keep the water level above the plates inside each cell because they will get damaged if the plates are exposed. Since the beginning of last week the water levels have not dropped at all. It's a good thing too, because I am pretty much out of distilled water.
Tuesday, October 23, 2012
Killawatt
Today I ordered up a Killawatt to monitor power consumption. Now that I am not using gasoline I may as well keep track of my electricity consumption, right?

As you can see, the Killiwatt simply goes in between the wall socket and my extension cord and tracks my power consumption. That way I can figure out my KWH/mile and maybe even MPGe if I feel like it. Which I probably will.
This week at work I am on evening shift, four to midnight. It is getting a little bit chilly in the evenings, so I fear that my battery capacity coming home may not suffice. For those of you who do not know, lead acid batteries lose much of their capacity as ambient temperatures go down - as much as 30-40% if it gets below freezing.
The Weather Network shows 6C outside right now. My voltmeter was a sagging little lower than normal up the hill, but I didn't notice any performance difference.
I preheated the car with a 120V heater for an hour before work ended. That way my EV heater only had to maintain the toastiness level instead of warming the whole interior up.
I have replaced the [hopefully] last dud battery in my pack with a [hopefully] decent one. Maybe tomorrow I will load test this one after driving to work and before charging. The car is still running great!
Monday, October 22, 2012
Battery Woes
The last few days I have been trying to get my battery pack in as good of condition as possible. This is relatively speaking, of course, because these are all used "dual purpose" group 31 batteries taken out of heavy trucks.
Last week I replaced one battery because after it took forever to charge, it failed my half CCA (350 amp) 15 second load test, sagging to 7.0V. 9.6V is minimum for a good battery.
The next day I went out for some errands on an 11 km long run and I barely made it home because the pack was sagging so hard by the end (down to 49V on acceleration at one point!). So the next day after driving to work and before charging, I gave each battery a 200 amp load test and found all batteries sagging to 10.3V-10.8V except one that was sagging to 8.5V, so I replaced it.
Now I have one battery that performs well, but once charged drops in voltage to 0.2V below all others. It slowly discharges and takes it's "buddy" down with it unless I keep the car plugged in, and then the charger cycles on and off to keep these two fully charged. Today at work I will swap it out for my very last free spare battery and hope for the best.
I am not sure what I will do if (or when?) the next battery lays an egg because my free battery supply is dwindling. I hope that the batteries I murdered so far were faulty all along (which is likely because they were removed from trucks for a reason) and that they are not being prematurely murdered by my car. I guess I will know soon enough.
If these Paccar Dual-Purpose batteries cannot handle duty in my electric car I may start replacing them two at a time with new deep cycle batteries from Interstate Battery. Through my work I get a smoking deal at Interstate and I would have 30 month warranty that way. But I wonder if I should replace dead ones with new as they fail or just pull the pin and drop $1000 on a new pack so I can just forget about it and be happy....
Friday, October 19, 2012
EV Album Entry
For those who don't know, there is a huge catalogue of EV conversions and vehicles at www.evalbum.com.
The entry for the Electric Booger is HERE.
Yesterday I ordered a decal for the back of the eBooger. Once it is installed I will be sure to post a picture.
The entry for the Electric Booger is HERE.
Yesterday I ordered a decal for the back of the eBooger. Once it is installed I will be sure to post a picture.
Thursday, October 18, 2012
Commuting
Yes folks: three days in a row to work, and back, with the Electric Booger. It was actually quite uneventful, other than the fact that I was driving on BC Hydro fuel.
I started writing this post with a whole bunch of technical stuff to say but soon realized that most readers don't care about that kind of stuff. They just want to know stuff like top speed and range. So here is what I have figured out so far.
-Top Speed on flat ground (so far): 80 km/h and still accelerating. I just haven't had the opportunity nor the space to do a true top speed run yet.
-Range: I have no idea. But it gets me to work and gets me back from work without putting a dent in the system voltmeter's reading.
-Charging time: after 6.5 km (with a big downhill) commute to work, three hours; after the commute home (with a big uphill), four hours.
So I guess I haven't divulged much information, but I guess it was worth a try.
Here is a question that I have been asked three times in the last two days:
"Have you thought about putting an alternator on the drive axle so you can charge the batteries while you drive?"
No. That will not work. Even if the hypothetical alternator is 100% efficient, it will take energy to turn the alternator, and this energy will have to come from the battery pack, cancelling out any energy produced by the alternator in the first place.
While not the best analogy, here is a highly educational video that might help explain what I am saying: WILE E COYOTE
Now to the technical stuff.
Field Power Problems
I quickly learned that 12V is not enough for the motor field. There is not enough torque for starting off and the motor revs much too high. This makes starting off in first gear mandatory (because of the lack of torque) and a shift to second gear at 35 km/h (when it starts to lose power), which is 7000 rpm. I even shifted at 40 km/h a few times, which is 8000 rpm. This is a good testament to my friend Matt's machining job on the motor to transmission coupler because it is still smooth as silk at those speeds.
Another problem with 12V to the field is that I can hear lots of brush arcing when the revs are high. I suspect that a weak field is much like running a series wound motor with too many volts at high speeds without advancing the brush timing, but I could be wrong.
Unfortunately there was a huge problem when I first put 24V to the field - a gigantic arc inside the field interrupt relay every time the relay opened the circuit. I could hear a sizzling noise every time this relay turned the field off. This is because the field windings are like a giant coil - thousands of revolutions of windings around the outside of the motor. Electricity has momentum and the coil acts like a 100 foot long electricity train that suddenly has no place to go when the relay is opened. The result is a giant voltage spike produced on the negative side of the relay contacts. It turns out that a normal 5-pin 40A relay is not made to handle this sort of spike. I think it is because the contacts do not move away from each other enough, allowing the arc to continue long after the contacts are open.
I was able to suppress this spike by using the 87a (normally closed) pin of the same relay to dump this spike to field ground. This worked with 24V to the field but when I tried 36V field power, it was again too much of a voltage spike and the relay quickly had sparks and funny burning smells flying out of it.
Yesterday I installed a larger relay to turn the field on and off - a relay that closely resembles a starter relay on some Ford vehicles. Now that the field power is being interupted with the larger relay, there is no arcing or funny relay noises even with 48 volts going to it. I seem to have solved this arcing issue for the time being. I am not sure the field voltage choice relay will last very long with the amount current I am forcing through it (it is merely a plastic, square 40A 5-pin relay) but I guess I will have to find out the hard way. I do have a spare relay in the glove box after all!
The other day I measured field current, which for power curve sakes is probably a more important figure than field voltage. But it turns out that the field winding resistance is exactly one ohm, so 12.5V applied = 12.5 amps, 25V = 25 amps, etc. Now I am at 48V for start off, and it makes quite a difference in torque. Most times I can take off from a stop in second gear.
Battery Diagnostics
I was originally going to install six small digital volt meters in an array to monitor each battery pair. I even bought a bunch of meters off eBay. However, in my great haste to get this car on the road I left them out. But it turns out that detecting bad batteries will not require individual volt meters.
Yesterday I charged the batteries after my commute home from work. I noticed that it took one pair an extra hour to charge, and one of these two batteries was making bubbling sounds. The next day when I got to work I immediately unhooked these two batteries from each other and measured their resting voltage. The one that had been bubbling while charging was a full volt lower than the other, so I charged it, removed it and load tested it. Yup, toast. 350 amps instantly brought it down to 7 volts. A battery should be about to handle half its cold cranking amps (these are 700CCA batteries) for 15 seconds and still be at 9.6V or greater. I quickly found a replacement in the core shed at work, tested it (9.8V on a load test) and replaced the dud. One the next full charge all of the chargers turned off within 15 minutes of each other. Problem solved. I guess this is another advantage of using individual 12 volt battery chargers.
Alltrax Controller
My friend Trevor lent me his remote inductive ammeter so I could monitor motor current. I am proud to say that Alltrax does not lie in their specs of 450A for two minutes and 350A for five minutes. On the way home from work yesterday I floored it all the way up the long hill. When I reached peak voltage (which is also peak power) and the current started to fall (57 km/h in second gear) I shifted into third and it held 450A all the way up the hill while still gaining speed. I am highly impressed with this controller.
Other than a little bit more tweaking and tinkering, I believe I can truly say that this project is quickly coming to a close. Today I finished my control panel that looks much better than the gaping hole under the radio:
 I absolutely love the old school red LED numbers. Dr. Emmett Brown would indeed be proud!
The extra meter in the centre will be the voltmeter for the 12V accessory battery. The switch on the right is the heater switch and the switch under the system voltmeter will be used to turn the voltmeter on and off. This switch is my solution to the fact that the [super cheap eBay] system voltmeter is causing a shared ground between the chassis and the traction system. I plan to power this voltmeter with a 9 volt battery through this switch to eliminate this problem.
Here is a picture of the organized mess formerly known as the engine compartment:
 I hope to have some videos soon. Until then, you will have to be patient!
I started writing this post with a whole bunch of technical stuff to say but soon realized that most readers don't care about that kind of stuff. They just want to know stuff like top speed and range. So here is what I have figured out so far.
-Top Speed on flat ground (so far): 80 km/h and still accelerating. I just haven't had the opportunity nor the space to do a true top speed run yet.
-Range: I have no idea. But it gets me to work and gets me back from work without putting a dent in the system voltmeter's reading.
-Charging time: after 6.5 km (with a big downhill) commute to work, three hours; after the commute home (with a big uphill), four hours.
So I guess I haven't divulged much information, but I guess it was worth a try.
Here is a question that I have been asked three times in the last two days:
"Have you thought about putting an alternator on the drive axle so you can charge the batteries while you drive?"
No. That will not work. Even if the hypothetical alternator is 100% efficient, it will take energy to turn the alternator, and this energy will have to come from the battery pack, cancelling out any energy produced by the alternator in the first place.
While not the best analogy, here is a highly educational video that might help explain what I am saying: WILE E COYOTE
Now to the technical stuff.
Field Power Problems
I quickly learned that 12V is not enough for the motor field. There is not enough torque for starting off and the motor revs much too high. This makes starting off in first gear mandatory (because of the lack of torque) and a shift to second gear at 35 km/h (when it starts to lose power), which is 7000 rpm. I even shifted at 40 km/h a few times, which is 8000 rpm. This is a good testament to my friend Matt's machining job on the motor to transmission coupler because it is still smooth as silk at those speeds.
Another problem with 12V to the field is that I can hear lots of brush arcing when the revs are high. I suspect that a weak field is much like running a series wound motor with too many volts at high speeds without advancing the brush timing, but I could be wrong.
Unfortunately there was a huge problem when I first put 24V to the field - a gigantic arc inside the field interrupt relay every time the relay opened the circuit. I could hear a sizzling noise every time this relay turned the field off. This is because the field windings are like a giant coil - thousands of revolutions of windings around the outside of the motor. Electricity has momentum and the coil acts like a 100 foot long electricity train that suddenly has no place to go when the relay is opened. The result is a giant voltage spike produced on the negative side of the relay contacts. It turns out that a normal 5-pin 40A relay is not made to handle this sort of spike. I think it is because the contacts do not move away from each other enough, allowing the arc to continue long after the contacts are open.
I was able to suppress this spike by using the 87a (normally closed) pin of the same relay to dump this spike to field ground. This worked with 24V to the field but when I tried 36V field power, it was again too much of a voltage spike and the relay quickly had sparks and funny burning smells flying out of it.
Yesterday I installed a larger relay to turn the field on and off - a relay that closely resembles a starter relay on some Ford vehicles. Now that the field power is being interupted with the larger relay, there is no arcing or funny relay noises even with 48 volts going to it. I seem to have solved this arcing issue for the time being. I am not sure the field voltage choice relay will last very long with the amount current I am forcing through it (it is merely a plastic, square 40A 5-pin relay) but I guess I will have to find out the hard way. I do have a spare relay in the glove box after all!
The other day I measured field current, which for power curve sakes is probably a more important figure than field voltage. But it turns out that the field winding resistance is exactly one ohm, so 12.5V applied = 12.5 amps, 25V = 25 amps, etc. Now I am at 48V for start off, and it makes quite a difference in torque. Most times I can take off from a stop in second gear.
Battery Diagnostics
I was originally going to install six small digital volt meters in an array to monitor each battery pair. I even bought a bunch of meters off eBay. However, in my great haste to get this car on the road I left them out. But it turns out that detecting bad batteries will not require individual volt meters.
Yesterday I charged the batteries after my commute home from work. I noticed that it took one pair an extra hour to charge, and one of these two batteries was making bubbling sounds. The next day when I got to work I immediately unhooked these two batteries from each other and measured their resting voltage. The one that had been bubbling while charging was a full volt lower than the other, so I charged it, removed it and load tested it. Yup, toast. 350 amps instantly brought it down to 7 volts. A battery should be about to handle half its cold cranking amps (these are 700CCA batteries) for 15 seconds and still be at 9.6V or greater. I quickly found a replacement in the core shed at work, tested it (9.8V on a load test) and replaced the dud. One the next full charge all of the chargers turned off within 15 minutes of each other. Problem solved. I guess this is another advantage of using individual 12 volt battery chargers.
Alltrax Controller
My friend Trevor lent me his remote inductive ammeter so I could monitor motor current. I am proud to say that Alltrax does not lie in their specs of 450A for two minutes and 350A for five minutes. On the way home from work yesterday I floored it all the way up the long hill. When I reached peak voltage (which is also peak power) and the current started to fall (57 km/h in second gear) I shifted into third and it held 450A all the way up the hill while still gaining speed. I am highly impressed with this controller.
Other than a little bit more tweaking and tinkering, I believe I can truly say that this project is quickly coming to a close. Today I finished my control panel that looks much better than the gaping hole under the radio:

The extra meter in the centre will be the voltmeter for the 12V accessory battery. The switch on the right is the heater switch and the switch under the system voltmeter will be used to turn the voltmeter on and off. This switch is my solution to the fact that the [super cheap eBay] system voltmeter is causing a shared ground between the chassis and the traction system. I plan to power this voltmeter with a 9 volt battery through this switch to eliminate this problem.
Here is a picture of the organized mess formerly known as the engine compartment:

Monday, October 15, 2012
It's better than I ever thought it could be
I just got back from a fairly lengthy test drive. I am blown away by how well my electric car works. Yes, I can officially say those words out loud - "my electric car". I was actually nervous about going out with it. Would it break? Leave me stranded? Catch on fire?
I left the field voltage switched to 12V the entire time. I found that on 24V, the field relay got smoking hot and started making hissing noises. I have never heard a relay make hissing noises before, but I know that's a bad thing. I believe it is a high current problem, not a higher than-designed-for voltage problem.
In most EV conversions, you usually start off in second gear. But I found second gear far too weak, so I got used to taking off in first and switching to second at about 30 km/h. It seemed to top out at 60 km/h in second and I didn't bother with third because of lack of space, but I am confident that it will easily exceed my goal of 70 km/h.
After one lap around the block I started to get confident, so I kept driving around and around, turning here and there. I probably drove a total of 10 minutes, and not with economy in mind. When I got back to my garage, the system voltage still read 73.6 volts, which means I hardly put a dent in the battery capacity. So I have a feeling that my 20 km range goal might be a possibility.
The power brakes work amazing. There was no difference between being powered by a Volvo vacuum pump and being powered by vacuum from the old ICE.
How quickly does it accelerate? Not very quickly, but it accelerates and that's all that matters. You have to realize it is now a 3200 lb car with about 25 horsepower (on a good day).
When I got back to the garage I quickly opened the hood and checked to see how hot the motor is. Remember that I have a very small motor here and I am asking it to do a lot. The motor was definitely warm, but I could easily hold my hand on it, so things are looking good there too.
Stay tuned for more pictures and video in the next while. Now I just can't wait to drive it again!
Sunday, October 14, 2012
Massive EV Grin On Test Drive #2
It turns out all I had to do is reverse the polarity of my field power to make the car go the right way. And I didn't blow up my field spike suppression diode. And I believe my field power interrupt relay welded itself shut because it was really cheap.
Test drive #2 was merely around our townhouse complex. It wasn't far (a few hundred feet) and it wasn't fast (20 km/h), but it sure was exhilarating! And eerily quiet.
I got around to buying some insurance for the eBooger. It turns out, all I had to do is ask the nice insurance lady to switch my fuel type to "electric" to change it. I don't know if it actually means anything, but it sure looks cool on the registration!

Saturday, October 13, 2012
First Test Drive Fail
Yes, there was a first test drive. But first, an update.
Battery cables + traction wiring - DONE
Rear battery pack venting pipes - DONE
TPS + control system wiring - DONE
Vacuum pump + vacuum pump wiring - DONE
Motor field control wiring - ALMOST DONE.
And this leads us to this morning's test drive attempt. Key switch on, all systems go. Put it into reverse to back off the ramps. Car lurches forward. Huh? Scratch head. Put it into first and the car backs off the ramps. Put it into reverse and drive forward back up onto the ramps.
Hmmm... So it has one forward gear and five reverse gears. I messed up somewhere. And my field interrupt relay welded itself closed, so power is always going to the field windings even with the key off and foot off the go pedal (until I remove the relay).
I have a good idea of what I did backwards but I will have to update later.
Here's a schematic of the field wiring. A pretty high tech drawing, I know.
Wednesday, October 10, 2012
Heater
The other day I went out and bought the $10 blow dryer from Canadian Tire. I dissected it to get the heating coils out of it. Built into the coils is a bimetallic temp control switch and a thermal fuse for safety.
 I was blown away (no pun intended) by how cheaply made this blow dryer is. The frame that the heating coils wrap around is two pieces of cardboard with a thin reflective coating so it doesn't immediately catch on fire!
With a healthy dose of duct tape and a few screws I installed this unit into the pipe that connects the blower fan to the the heater box:
 All of the blower fan air is forced through the ex-blow dryer. After installing this pipe back into the car, I decided to run a resilience test. I turned on the car's heater fan and plugged the hair dryer heating coils to the wall outlet for about 10 minutes. I am happy to say that the heater instantly blew warm air. There was no melting, burning, funny smells or fire. I pulled the pipe back out to inspect the duct tape and it looked good.
Instead of 120VAC, the heating coils will be powered by 72VDC in the car. That doesn't sound like a lot (40% less voltage) but I did notice that no matter what speed I ran the heater fan during the test, the air seemed to stay the same temperature, indicating that the bimetallic temperature control was hard at work doing its job. What this tells me is that 120VAC is way more than enough to maintain the target air temperature at any fan speed, so 72VDC will most likely be enough [at least] in the lower fan settings.
In other news, I spent lots of time making battery cables yesterday. I had plenty of 4/0 truck battery cable to do the job. Armed with a borrowed terminal crimper and 36 copper 3/8" battery terminals, I got it done. Today I made a bracket to mount the contactor (the main disconnect relay that all traction power goes through) and I mounted the controller. Once the control board (literally board. It's a piece of Ikea shelf) is more complete I will post pictures, mostly just to confuse everyone, including myself.

With a healthy dose of duct tape and a few screws I installed this unit into the pipe that connects the blower fan to the the heater box:

Instead of 120VAC, the heating coils will be powered by 72VDC in the car. That doesn't sound like a lot (40% less voltage) but I did notice that no matter what speed I ran the heater fan during the test, the air seemed to stay the same temperature, indicating that the bimetallic temperature control was hard at work doing its job. What this tells me is that 120VAC is way more than enough to maintain the target air temperature at any fan speed, so 72VDC will most likely be enough [at least] in the lower fan settings.
In other news, I spent lots of time making battery cables yesterday. I had plenty of 4/0 truck battery cable to do the job. Armed with a borrowed terminal crimper and 36 copper 3/8" battery terminals, I got it done. Today I made a bracket to mount the contactor (the main disconnect relay that all traction power goes through) and I mounted the controller. Once the control board (literally board. It's a piece of Ikea shelf) is more complete I will post pictures, mostly just to confuse everyone, including myself.
Sunday, October 7, 2012
The Running Gag In ALL EV Conversions
You can put a charging cord almost anywhere in an EV conversion: under the hood, in the trunk, etc. However, you will find that in each and every conversion, the charging plug is ALWAYS located where the gas cap used to go. It's the running gag that simply states, "nothing goes into this tank except electricity."
I just finished making mine:

I just finished making mine:

All The Batteries Are In
Yes, I did in fact break a sweat hand bombing 798 lbs of lead batteries into this thing!
Here is the rear pack ready to be wired up:
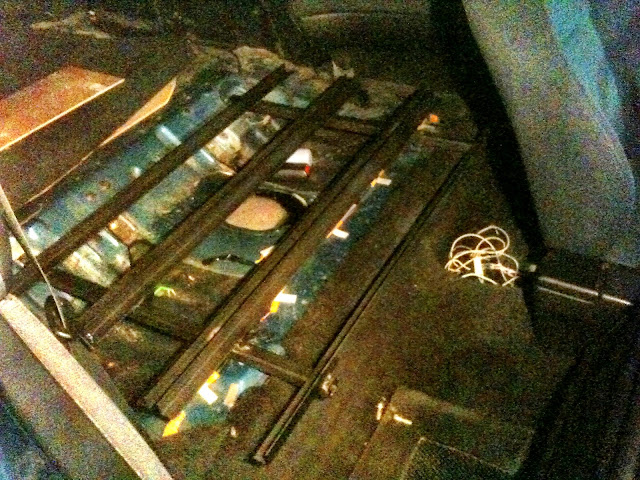
 And de-apholstering the rear seat has made a brilliant area to mount the rear chargers.
Hopefully tonight I will be able to sort through all the used truck battery cables I have laying in the corner of my garage.
Here is the rear pack ready to be wired up:

Hopefully tonight I will be able to sort through all the used truck battery cables I have laying in the corner of my garage.
Saturday, October 6, 2012
Wheels Spinning By The Magic Of Electricity
I have sort of been putting off reinstalling the axles, so today I finally got to it. And this, ladies and gentlemen, means that I was finally able to test out the entire drivetrain to make sure when I give it power, the wheels will actually spin.
Here it is:
Here it is:
Battery Racks & Heater Plans
I have been very busy working on the Electric Booger. A couple of visits to Metal Supermarket and a welder borrowed from my buddy Trevor allowed me to complete the battery racks.
Here is the front rack:
 With batteries in place:
 Yesterday I completed the rear battery racks:
 That's right, no more back seat. My choices were to keep the useful trunk and use the useless back seat for batteries or keep the useless back seat and use the useful truck for batteries. It was an easy decision.
Now on to the heater. As everyone knows, with a lack of ICE, there will be no hot engine coolant to keep me warm on cold winter mornings. The usual EV conversion solution is to remove the heater core and install the ceramic element out of a small 110V heater. However, after doing some research on MX-3 heater core removal, I have decided against this. You basically have to disassemble the entire dashboard to get the heater core out, and right now I do not have patience for that.
The other day I was giving the heater system a good hard look. It turns out that the heater fan box is at the right side of the car and connects to the heater box with a plastic pipe that takes about 10 seconds to remove:

Here is the front rack:


Now on to the heater. As everyone knows, with a lack of ICE, there will be no hot engine coolant to keep me warm on cold winter mornings. The usual EV conversion solution is to remove the heater core and install the ceramic element out of a small 110V heater. However, after doing some research on MX-3 heater core removal, I have decided against this. You basically have to disassemble the entire dashboard to get the heater core out, and right now I do not have patience for that.
The other day I was giving the heater system a good hard look. It turns out that the heater fan box is at the right side of the car and connects to the heater box with a plastic pipe that takes about 10 seconds to remove:

So here's the new plan: buy a cheap hair blowdryer to stuff inside this pipe so all the heater fan air is forced through it. I will power the heating elements with my battery pack through a decently sized contactor. Sounds like a plan to me. Hopefully this plastic pipe won't melt too quickly!
Subscribe to:
Posts (Atom)